Koha Librarian Use
- Former user (Deleted)
- Eric Feldhusen (Unlicensed)
- Lauren Keller
Accessing The Koha Administrative System
In order to access the Koha Admin page, you will need to navigate to the correct location using the link that corresponds to your district:
Bessemer: https://bes-intra-library.remc1.net/
Chassell: https://cts-intra-library.remc1.net/
Copper Country ISD: https://ccisd-intra-library.remc1.net
Copper Island Academy: https://cia-intra-library.remc1.net/
Ewen Trout Creek: https://etc-intra-library.remc1.net/
Ironwood: https://iwd-intra-library.remc1.net/
Stanton: https://stpsd-intra-library.remc1.net/
REMC1: https://remc1-intra-library.remc1.net/
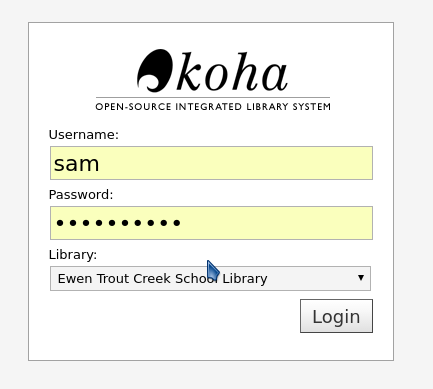
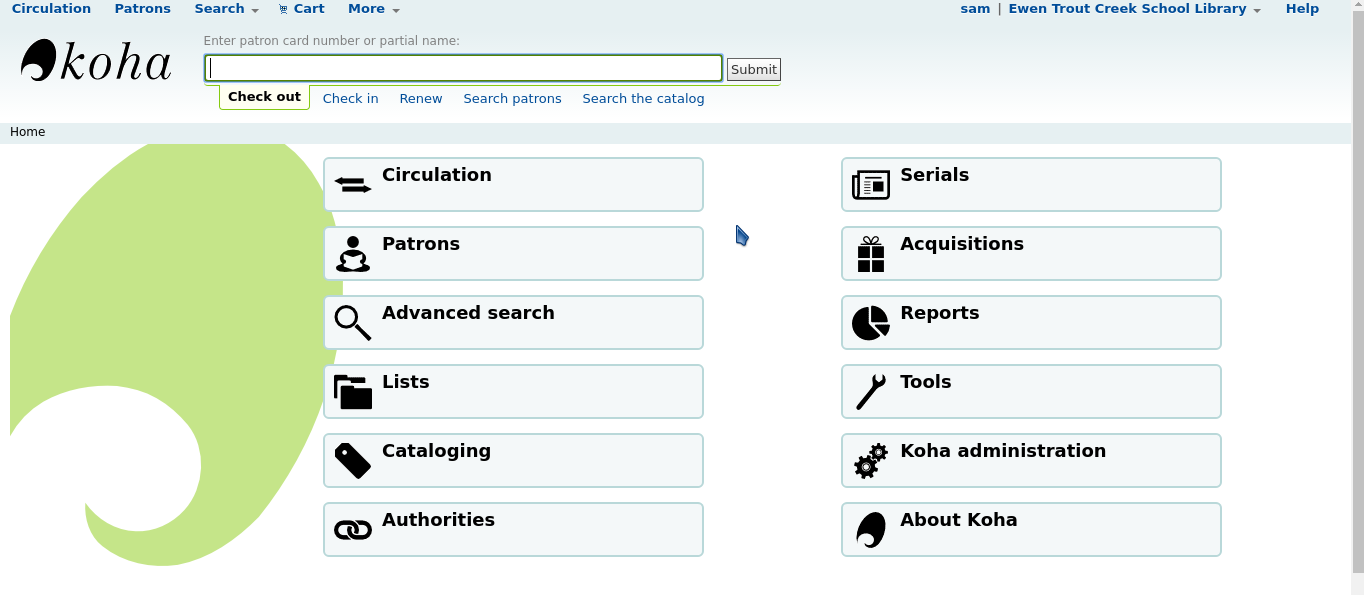
This link will bring you to a page to login, this is shown as the first image in this section. You will want to use the username and password that you use to sign onto district computers and your school's internet. Make sure that the library option is set for your school's library and not "My Library". Once you have logged in, you will be brought to the main Koha menu shown as the second image in this section.
Searching The Catalog
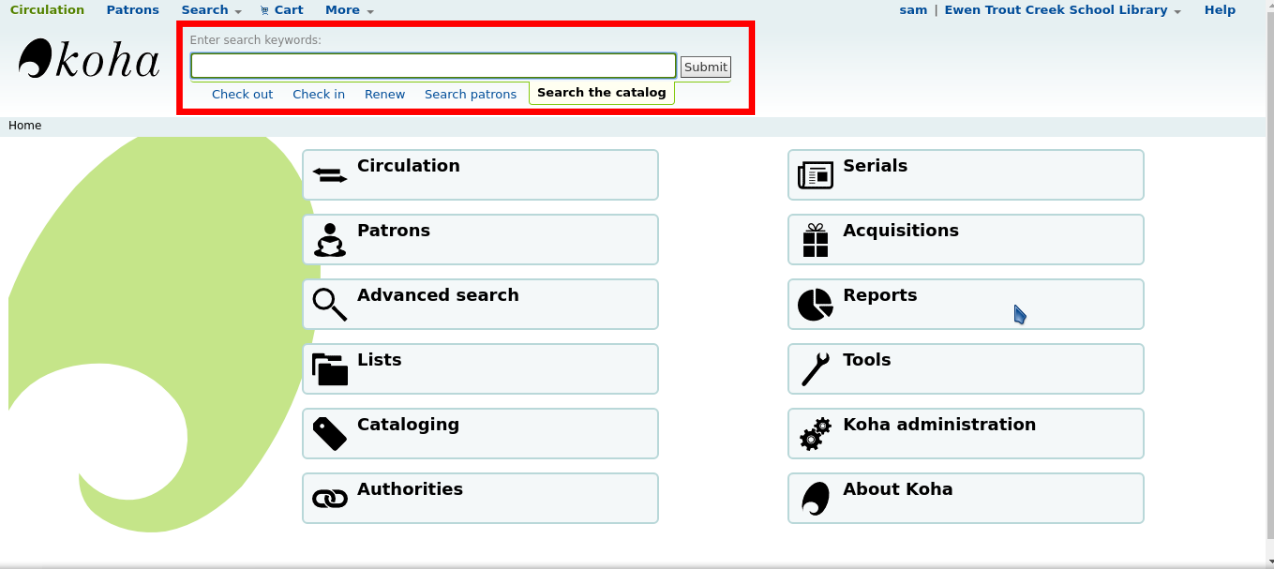
To search your school district's Koha catalog, use the search bar at the top of the screen; make sure that the tab underneath the search bar is set to "Search The Catalog". This is shown in this section's first image.
The second image in this section shows the form that your search results will take. They will list the title, author, media type (books, video, etc), and availability in your library system. All of these options can be used as search terms for searching the catalog.

Checkout and Check-in
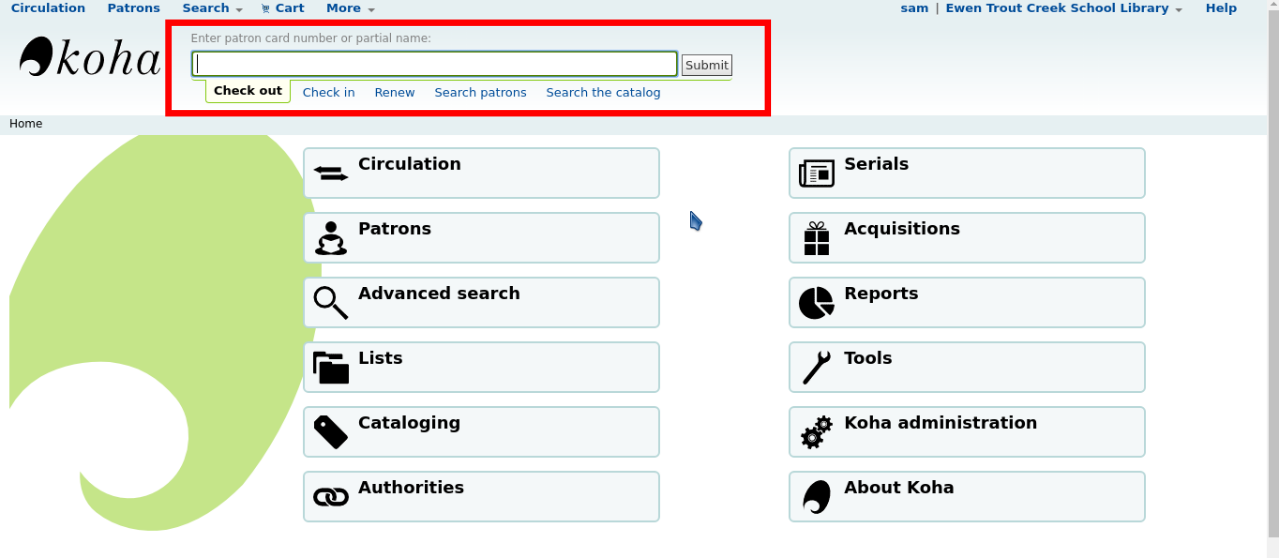
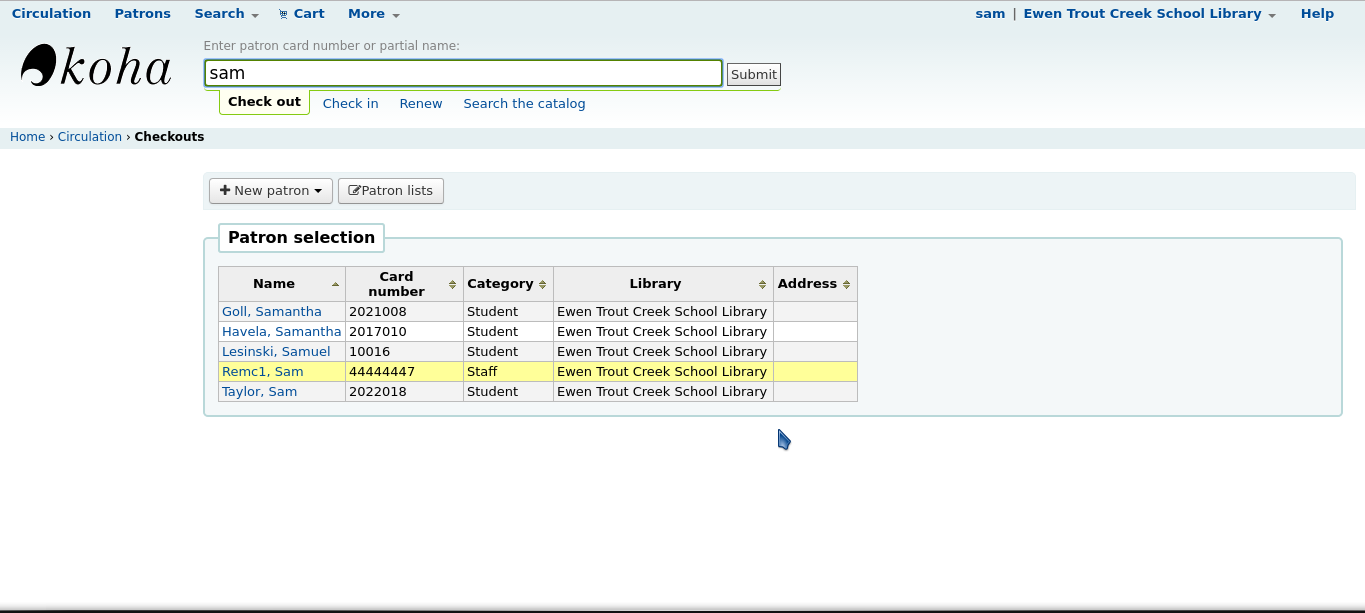
- To check out an item from the catalog you will need to use the search bar at the top of the Koha page, make sure that the tab that you have selected is the checkout tab; this is shown in the first image in this section. When checking an item out of the Koha catalog, you must first find the user that you are checking the item out to; if you try to check out the item by entering the barcode into the first search bar, it will not work. Enter the first or last name of the person that the item is being checked out to into the search bar, this will bring up a list of users in the system; this is shown in the second image in this section.
- Alternatively, see Koha Librarian Use#Printing a Patron Card for another option of entering students name during this step.
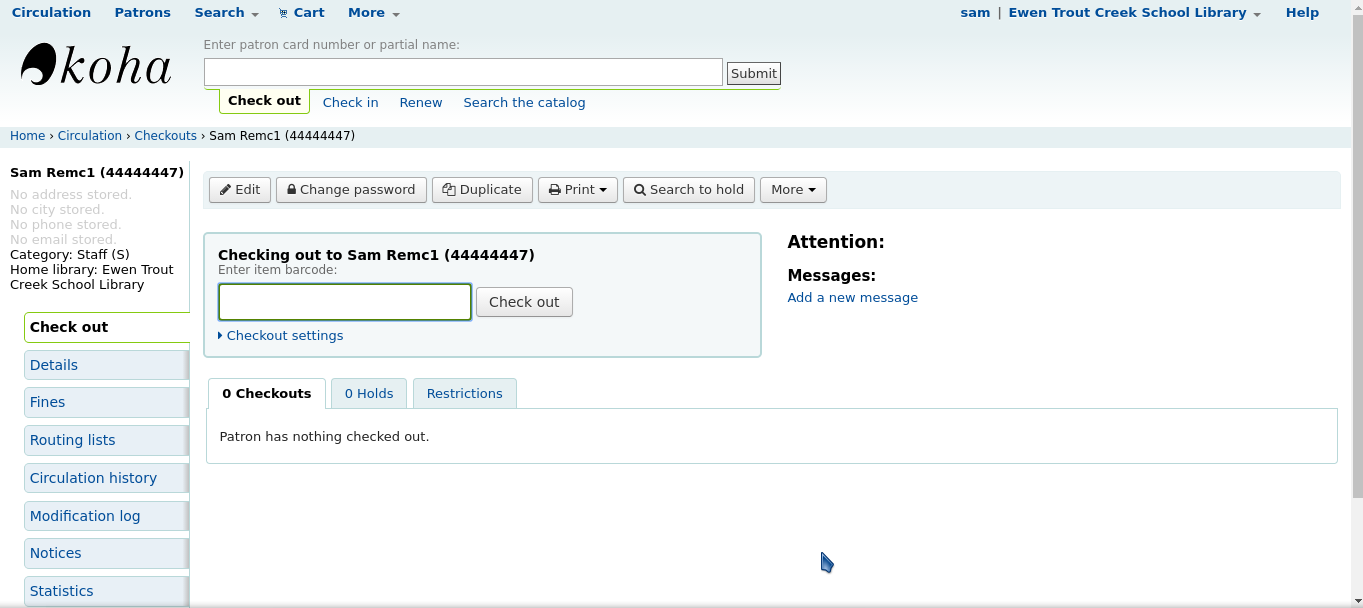
- Once you have found the correct name in your search results, click on it. You will be brought to the check outs for this user, an example of what this page should look like is shown in the third image in this section.
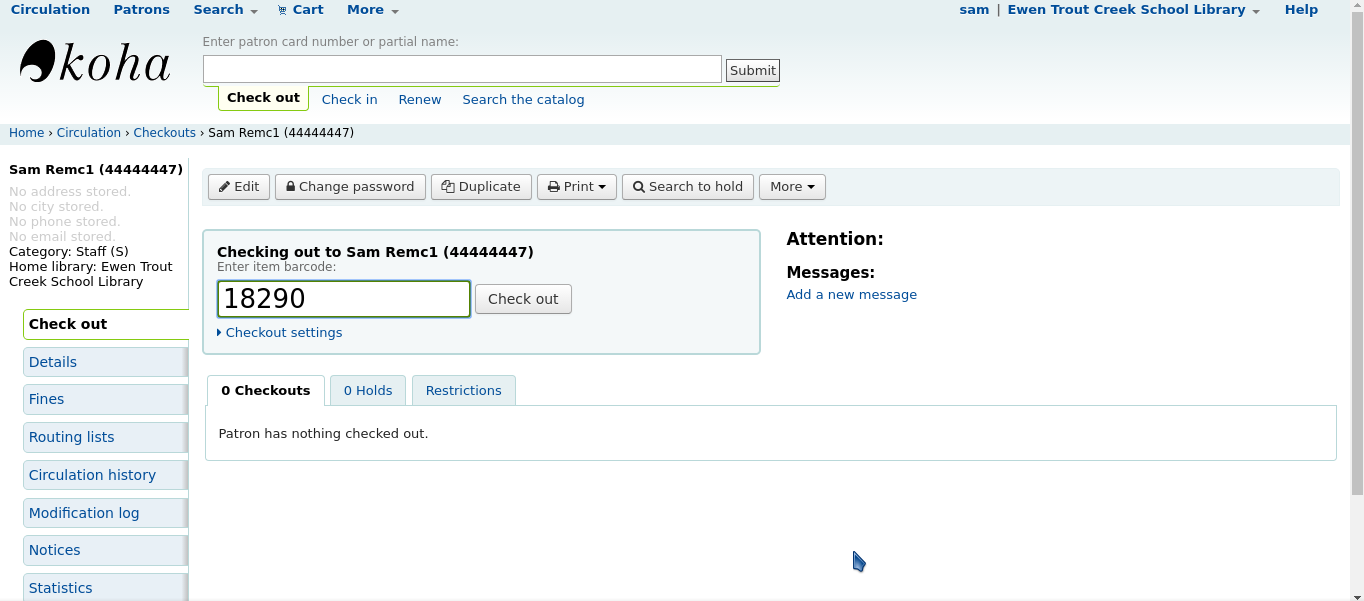
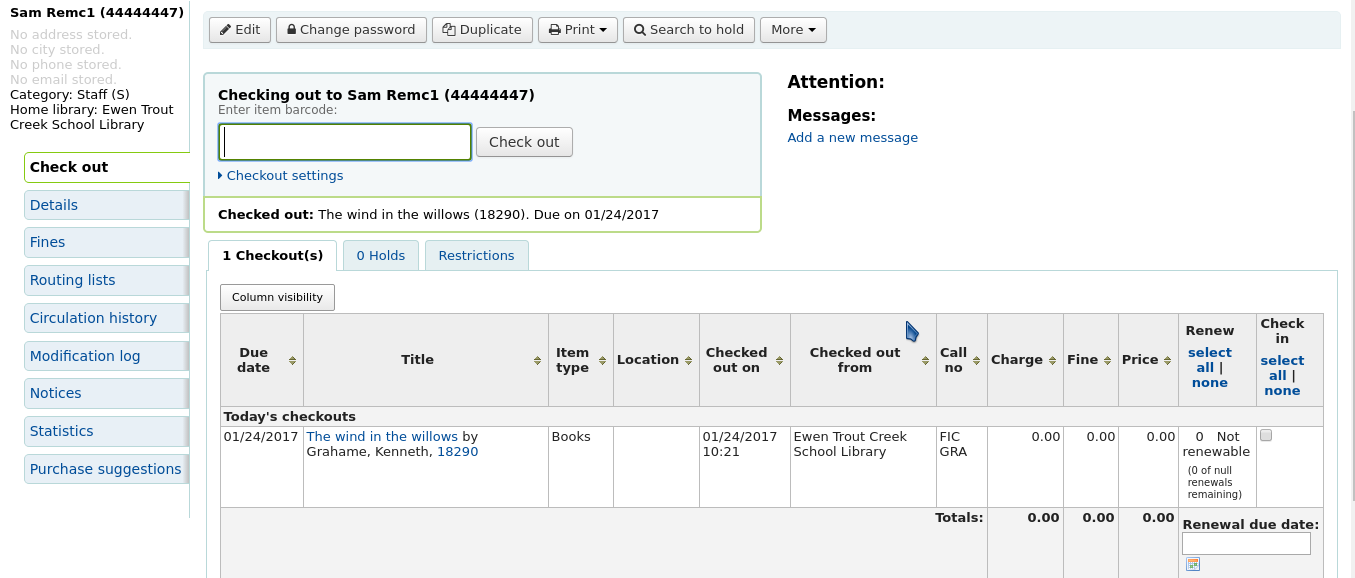
- From the checkout tab, simply scan or type the barcode into the checkout box; it should automatically enter the result. In the event that the barcode is not automatically entered, simply press the "checkout" button. This step is shown in the fourth image in this section.
- The item should show up in the list of checkouts for the user as show in this sections fifth image.
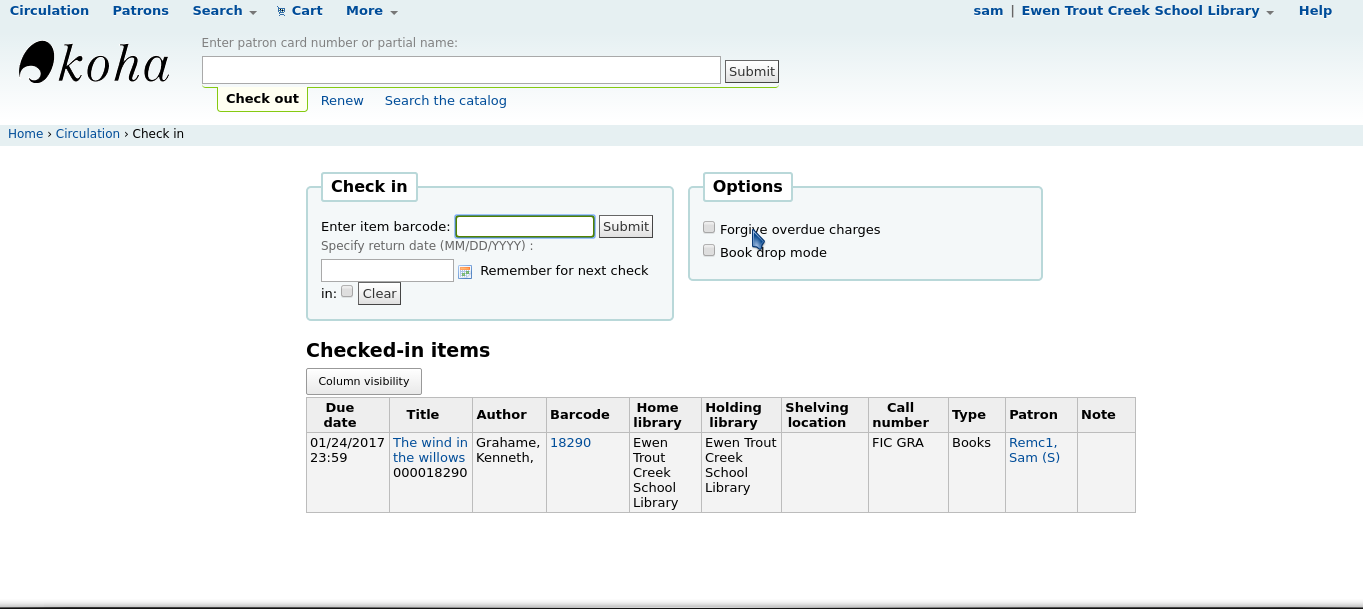
- To check an item back in, you will want to use the search bar at the top of the Koha window once again. This time however, select the "check in" tab shown in the sixth image for this section.
- Simply scan or type the item's barcode into the search bar and the item will be checked back in; you will be brought to another page confirming that the item was checked back in correctly, this page is shown in the seventh image of this section.

Adding New Users to Koha
Create a patron:
For students in school systems this should be automated from powerschool information, this is mostly only for non school instances.
- In the upper left click "Patrons"
- Click + New patron and pick a user type that matches the patrons use case
- You must enter Surname, card number. Library and category should already be filled in but can be changed. First Name would also be recommended and contact info if needed.
- Hit Save
Printing a Patron Card:
In Koha it is also possible to print a card for a list of patrons. The card can include up to three lines of text and the patrons Koha ID number in barcode format.
This barcode can be scanned during the checkout stage of using the system. External Documentation on how to create the barcodes is located here https://koha-community.org/manual/23.05/en/html/tools.html#patron-card-creator
Create a intra (staff side) user
- Follow the steps above for creating a patron, but on the create page fill in a username and password under the OPAC/Staff login section.
- Once the user is saved Assign them permissions by pressing More then Set Permissions from the Patron details page
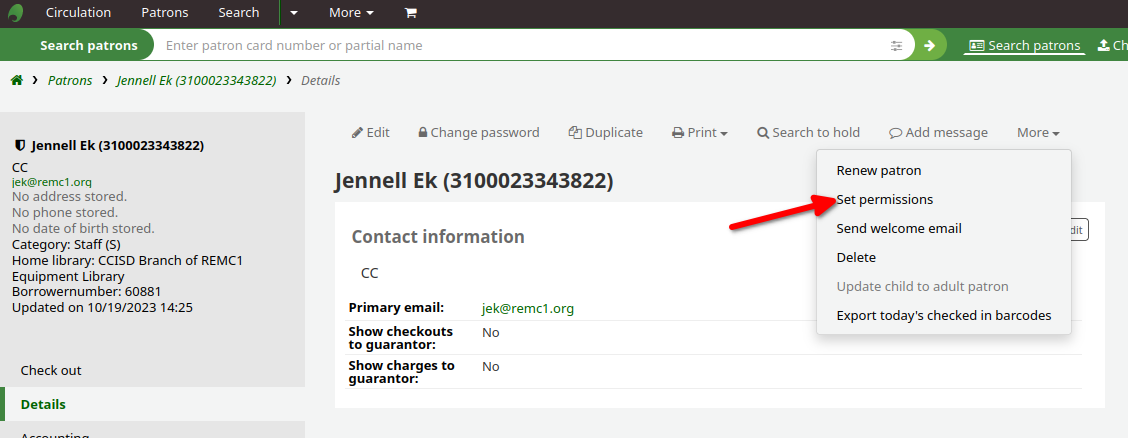
- At a minimum give them catalogue the other options depend on what they need to do and are labeled on the page, you cannot give more powers to someone then you already have. If they need additional powers contact the helpdesk by creating a ticket with their koha username, school district, and what permission they need in the ticket information.
Adding Books to Koha
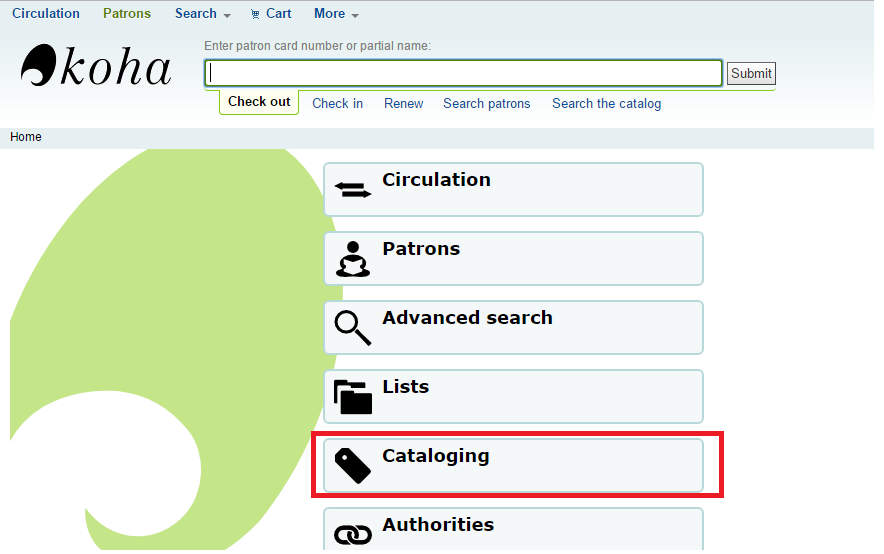
These steps should be made if the book is a new addition to your library. Pictures below are labeled in the order they come up in the directions.
- From the home page of Koha, select "Cataloging".
- The first step is to simply search the catalog for the title of the media that you are trying to add; using the bar at the top of the screen, this will only work if there is/was a record of what you are adding that is in Koha. If you still do not find a record for the item in question, continue on to step 2. Otherwise do the following:
- If you find the record in the catalog itself (if you have a catalog imported from a previous collection), click on Actions to the right of the title and then click "Edit".
- Then skip to step 6
- If instead you have found the correct item from the search in the reservoir, select the actions drop down arrow on the right side of the selection and hit "Add biblio"
- Skip to step 5.
- If you find the record in the catalog itself (if you have a catalog imported from a previous collection), click on Actions to the right of the title and then click "Edit".
- The first step is to simply search the catalog for the title of the media that you are trying to add; using the bar at the top of the screen, this will only work if there is/was a record of what you are adding that is in Koha. If you still do not find a record for the item in question, continue on to step 2. Otherwise do the following:
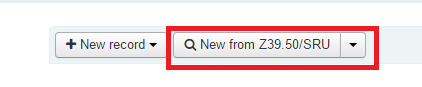
- Select the "New from Z39.50/SRU" button. This will bring up a new window.
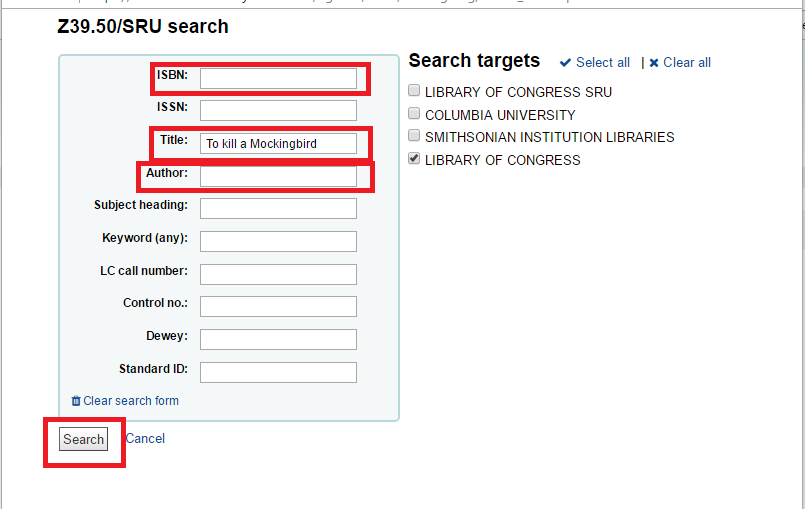
- First try searching the books title in the "Title:" section. If this does not bring any results you can try the author or the ISBN number by hitting "Try New Search".
- Often times there are multiple ISBN numbers for one book. Simply google search the book title along with ISBN and try all of the ISBN numbers listed.
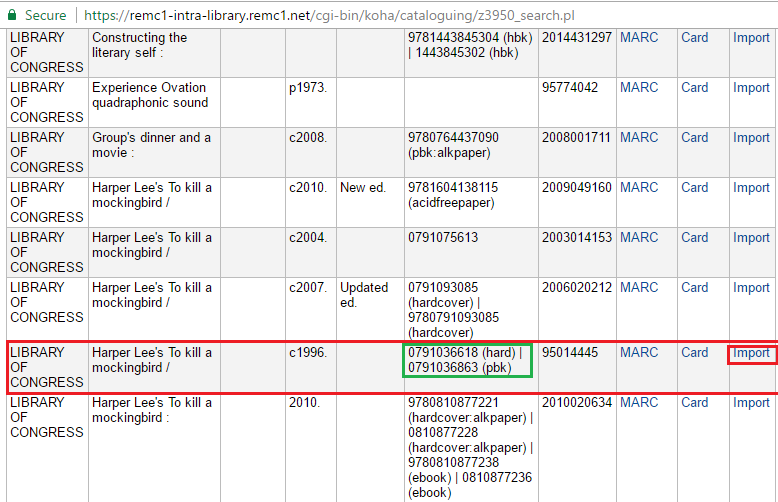
- When you find the correct book, click the import button. This will import all of the relevant information to the record. You will now see tabs 0 through 9 on the screen.
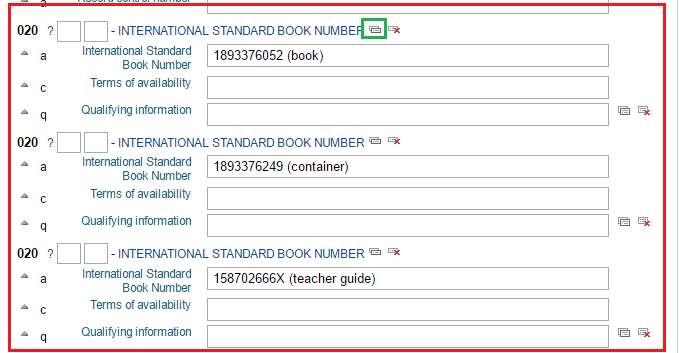
- Make sure you check the ISBN number (In green below). If your ISBN does not match the ISBN in the record, you will have to add your ISBN. See "Adding ISBN to an existing record" below for directions.
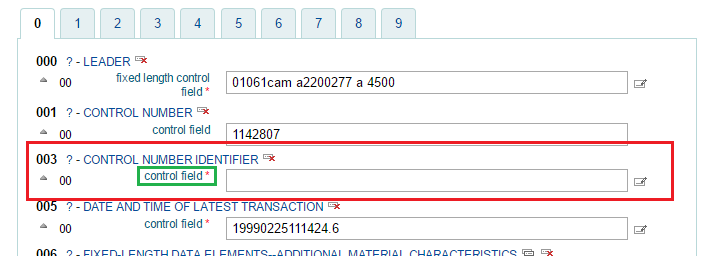
- In section 003 you will have to enter a Control Number Identifier. This will autofill if you hit the "Control Field" text.
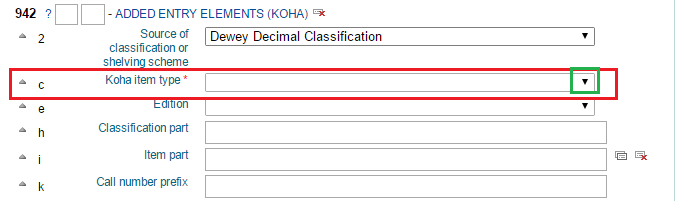
- In tab 9, section 942, subsection c, you will have to change the Koha Item type to Books.
- Hit the save button. This will bring you to the add item page.
- If you have a barcode to enter, scroll down to section p - Barcode and enter the barcode. In order to make the scanner work, you will need to enter the exact barcode you have on the book.
- Hit Add item
At this point, you should see the item added with the barcode and ISBN numbers in place.
1.
2. 
3.
4. 
5. 
6.
7.
8.

Adding a new ISBN number to an existing record
Sometimes there are multiple ISBNs for one record. These are often labeled with the number and a description of the book. (IE 123456789 (Hard cover) or 987654321 (ebook) )
To check the ISBN number:
- Go to tab 0, section 020.
- Click on the little button that will read "Repeat this Tag" if you hover over it.
- With another tag copied, enter the ISBN number for your book and label accordingly. You can see the "Adventures of Huckleberry Finn" has three different ISBNs.