...
- Once logged in to the Access Control Manager, select the "Schedules" button from the settings drop down menu.
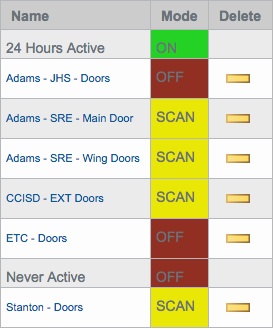
- You will now see a listing of schedules. Select the one for your district.
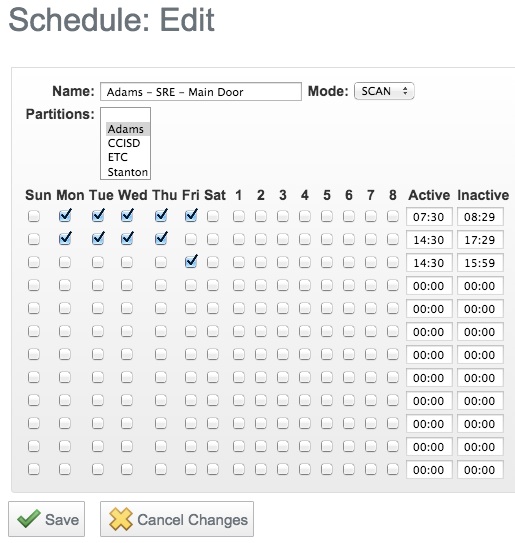
- You should now see the area to edit the schedule.
- You can create complex schedules in this section. For each line, you can select a day as well as a time. You can also create muti-line schedules that can do more complex things. However, there are a few important things to remember:
- Under "Mode" there are 3 options (on, off, and scan). "On" means the schedule will ignore everything below and be on 24/7. "Off" means off 24/7. "Scan" means to follow the settings below.
- You must enter the 59th minute of an hour to get an even hour on the "Inactive" part of the table. For example, to get 8 AM you must enter 7:59.
- All of the settings are in 24 hour time.
- When you are finished, click save to apply your changes.


